Add / Manage Test Devices
Adding your test device and managing test devices while you run multiple scenarios
Testing your Referral Campaign is a critical step towards going live & publishing it on your app. The steps here would only be able to help you set up and get started with the testing. The onus to build specific use-cases, and regressive testing to ensure all fail safe is met – remain upon you.
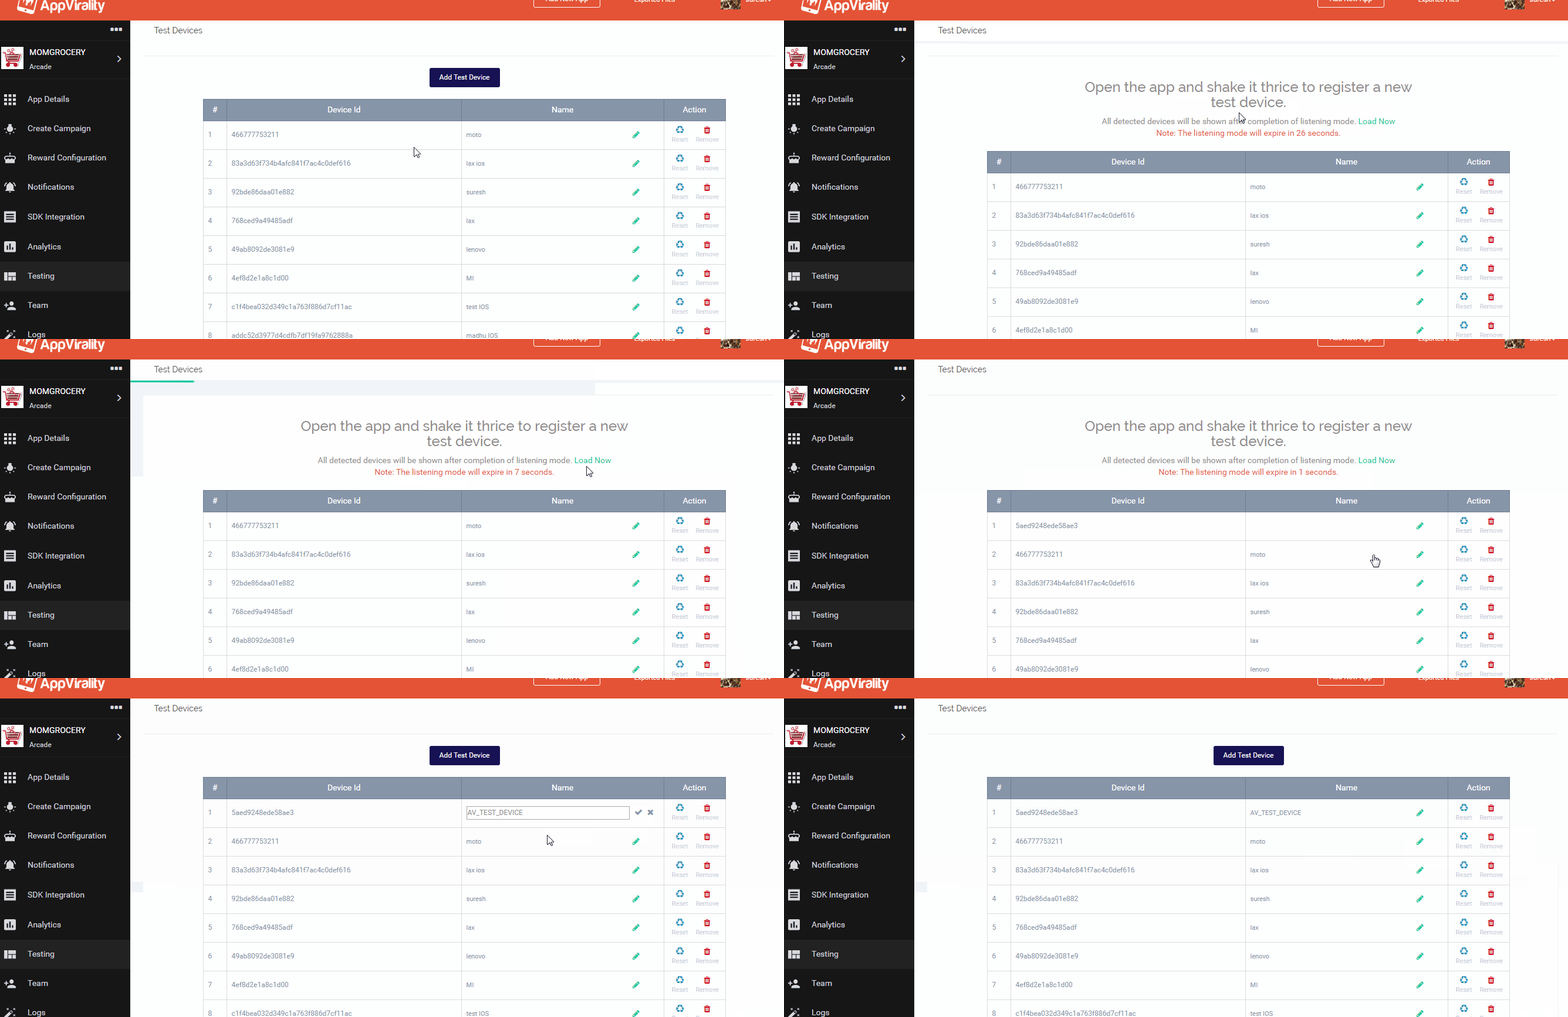
Adding your Test Device

- From your Dashboard, navigate to Testing
- Ready your Test Device with your test app opened up
- Click on Add Test Device
- Shake your device horizontally at least 3 times.
Alternatively, you can have a button inside the app to help you add the device, thereby skipping the shake phone step. This API call could help you achieve the same.
debug mode success
Once the debug mode starts, you will see a toast message saying “Your device started in debug mode” inside the app
- We highly recommend renaming your devices immediately after adding them to the Test Devices list
- You can “Reset” them at any point from AppVirality dashboard itself to reuse them as new devices
- Click “Remove” against device to completely release a device from test mode
There are certain pre-testing steps that must be ensured before you proceed to the testing. This is mainly biased towards the platform on which you are looking to test your referral upon i.e. Android, iOS or Web.
iOS App
- Add the key ‘AppViralityDebug‘ inside the info.plist file and set the value to YES.
- Add your test device: Dashboard => Testing => Add Test Devices
- Initiate the Test Device registration – trigger the callback method registerAsDebugDevice by means of a clickAction coupled to the callback code block, as stated below:
[AppVirality registerAsDebugDevice:^(BOOL success, NSError *error) {
        NSLog(@"Register Test Device Response: %d ", success);
    }];
You may have a button named ‘Add a Test device‘ in your app for this purpose. You would need it after initiating ‘Add Test Button‘ in the dashboard.
(OR)
If you are using Sample App provided by AppVirality, you may simply open the App on the device and shake it twice to add the device in Test Devices list.
Android App
- In the 3rd Step of the Android SDK integration, you configured your app’s manifest file to add the AppVirality API key using the <meta-data> tag. At the same place, add one more <meta-data> tag with name as “com.appvirality.sdk.TestMode” and value as “true“, to let the AppVirality SDK know that your app is in test mode, so as to enable testing.
- Get your App or APK (with SDK) pre-downloaded in your Test Devices, so that you can access them readily.
Get Out of Debug Mode
Once you’re done with testing, in the final release build, don’t forget to set “com.appvirality.sdk.TestMode” <meta-data> element’s value to “false“.
Tip Send APK via e-mail to both the devices, as you will have to install and uninstall frequently during the testing cycle.